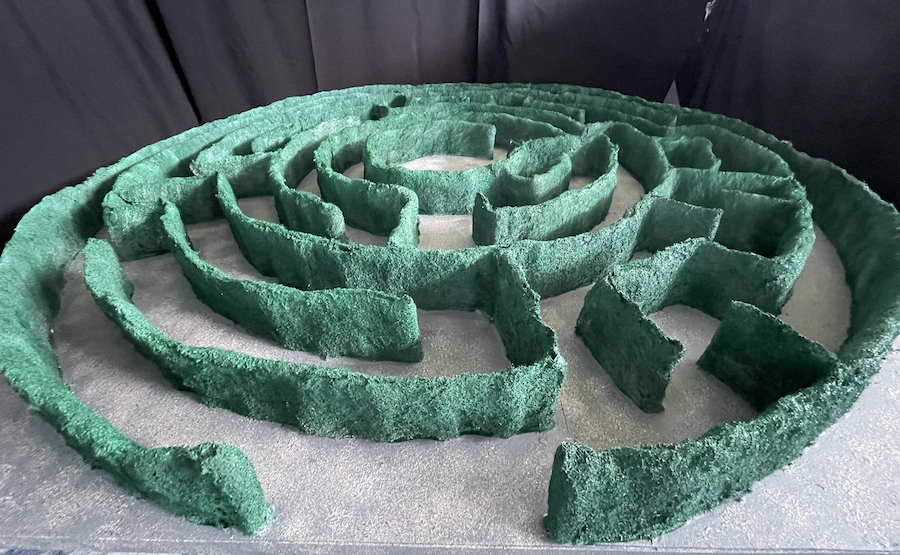
This project was a part of a film project conceived a little earlier in the year with a film maker friend, the idea being to create a model maze sufficiently big to to handle the width of a small camera. It had to be reasonably light and fairly durable to stand up to the occasional friction of the camera equipment, and also make sense as a coherent maze.
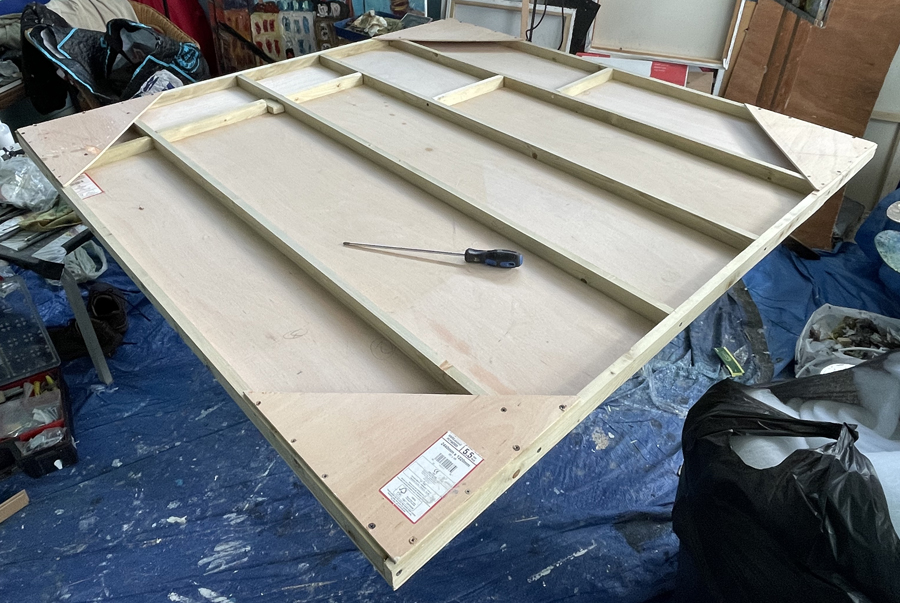
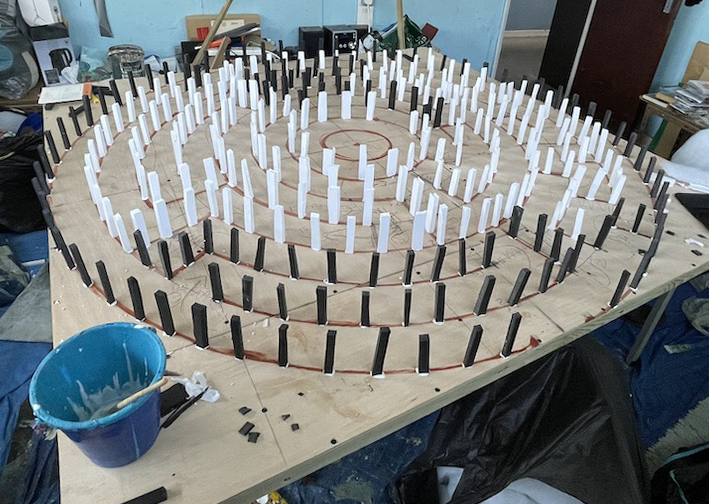
The width was decided on in advance, about 5ft or just over 1.5 metres, and a layer of thin plywood would form the base, reinforced by small lengths of timber.
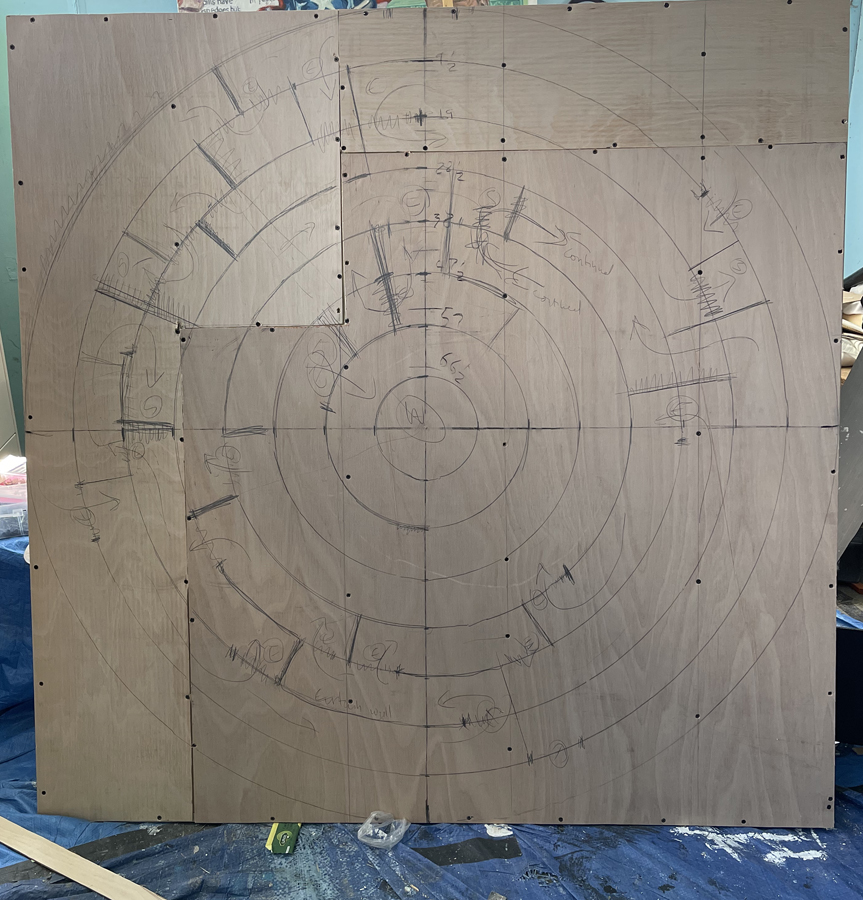
Once a firm surface had been constructed, the maze was laid out following a rough drawing and small and flexible strips were glued as ‘posts’ to hold the soft material that would be used for the sides of the maze.
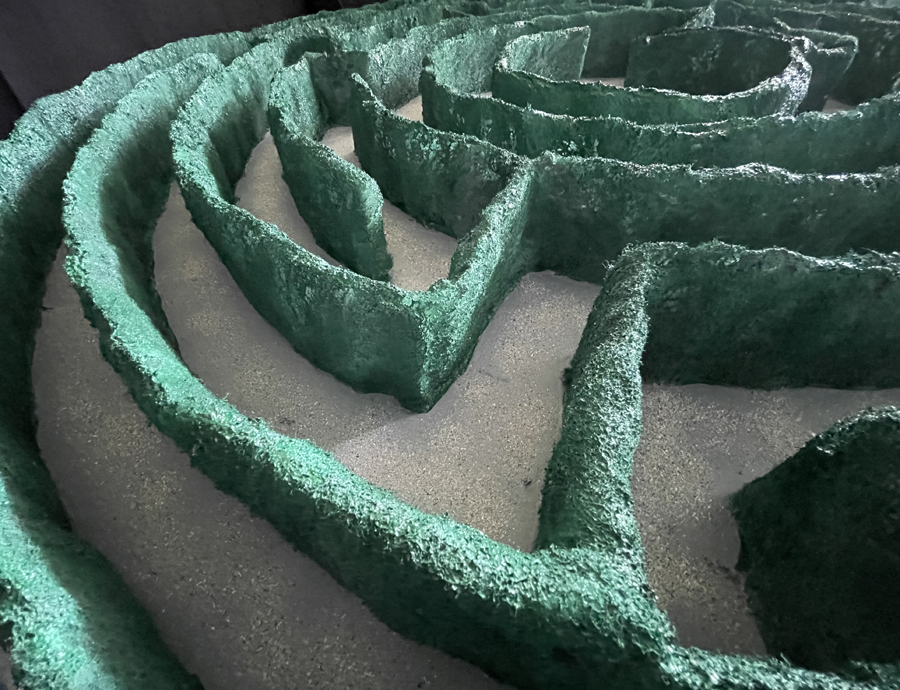
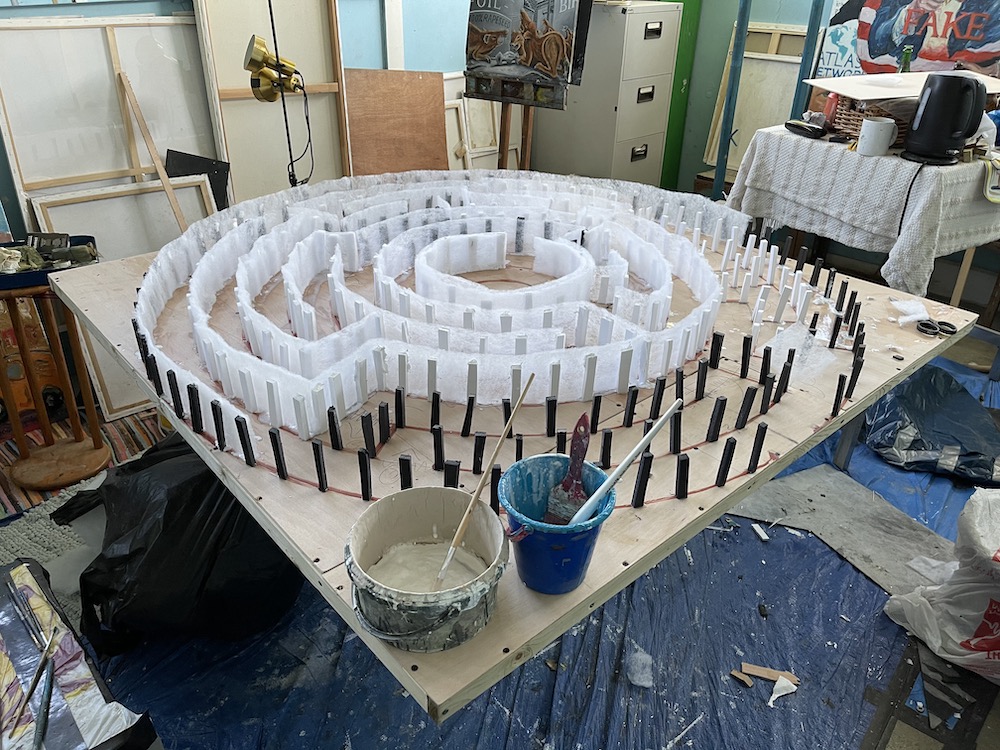
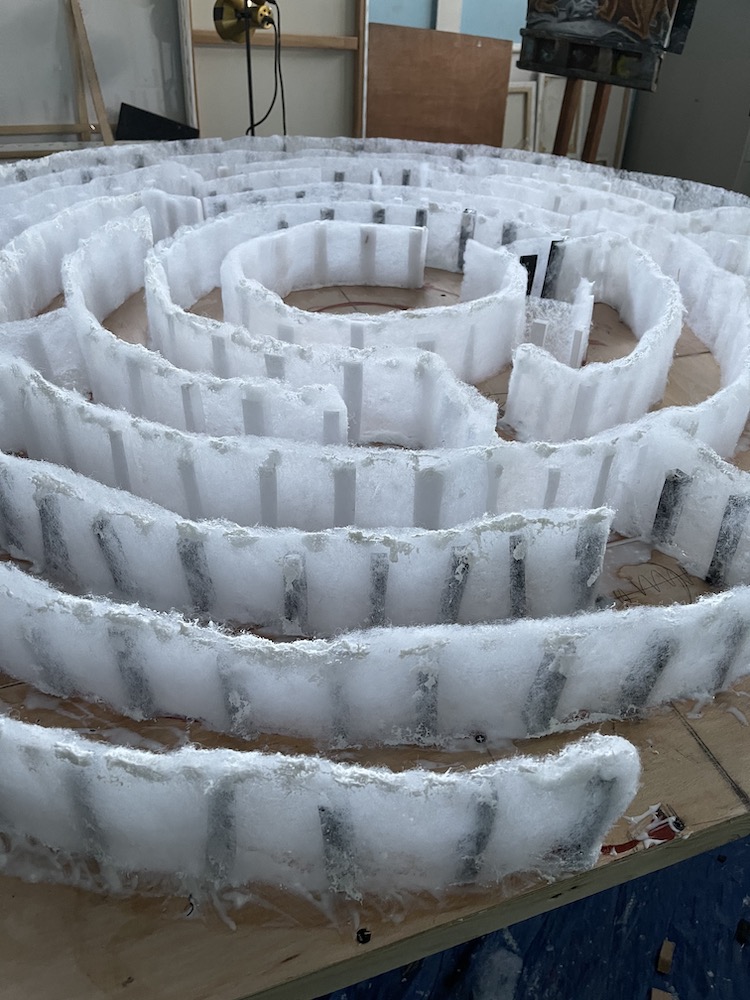
Starting from the centre and winding steadily outwards, a soft type of cushion-filler material was glued carefully to the sides of the posts. This was the most fiddly aspect of the model, and it was important to keep the width of the maze walls even throughout.
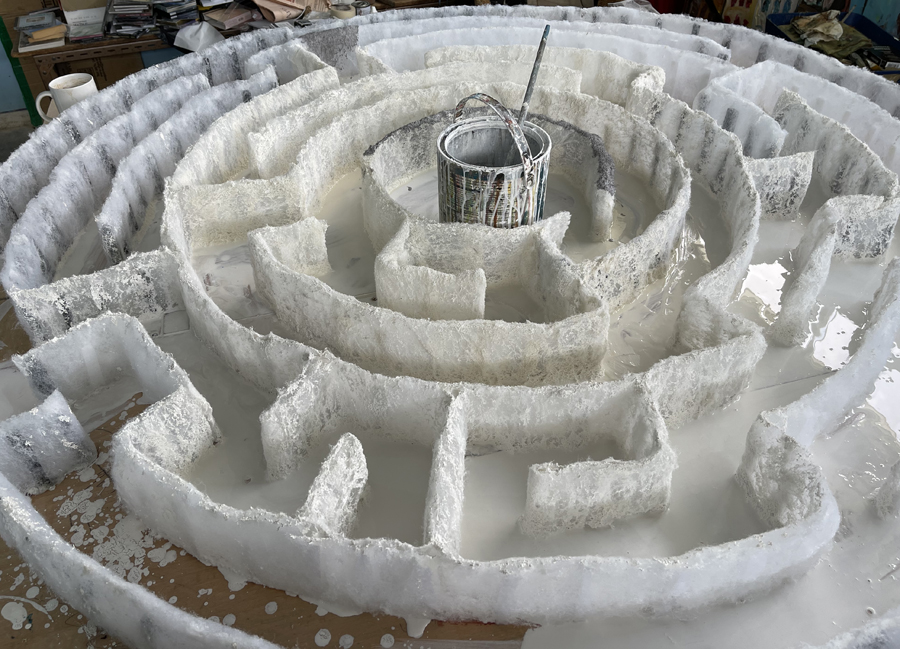
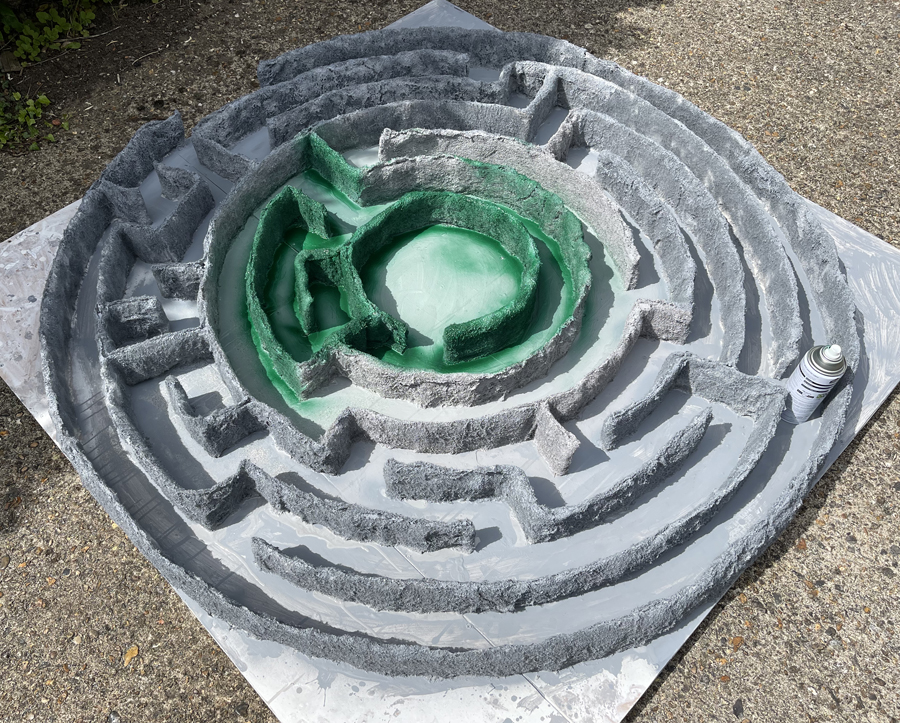
Once completed, a layer of diluted white primer paint was applied to the fabric, firming it up and preparing it for the subsequent layers of paint.
A layer of grey acrylic was next applied, and then, once completely dry, a green acrylic spray was applied to the model’s surface.
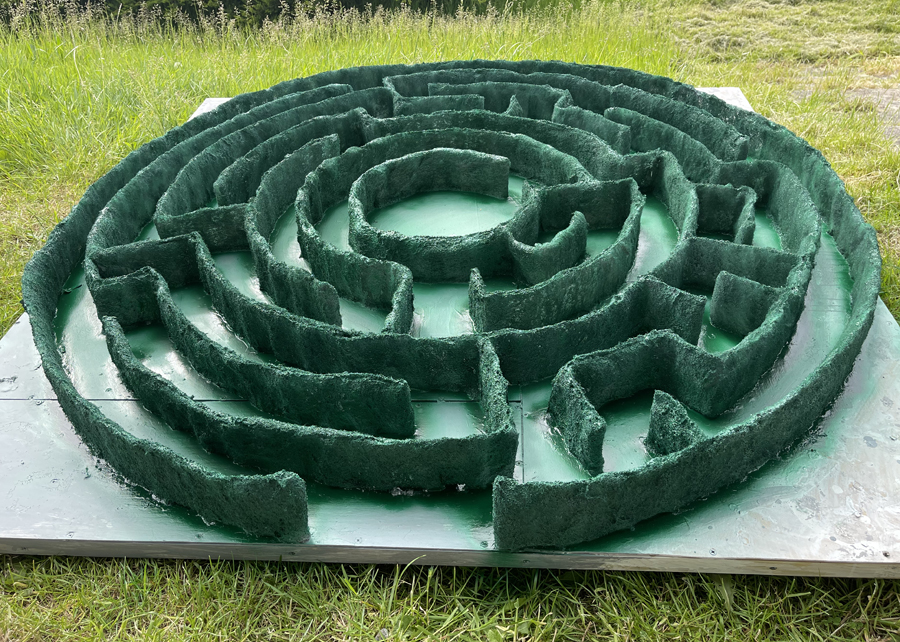
The whole piece was then finished off with a combination of painted colours and sprays for the ground. It was light enough to be easily transported on a roof rack, ready for use by the film maker, with the rest of the work of film making to be done.